Saturday, July 7, 2012

Lasagna Roll-ups

I have seen several variations of lasagna roll-ups, but I couldn't find an easy one that I liked.  I came up with my own.  The main reason I like the idea of roll-ups rather than normal layered lasagna is that I can control my portion easily.  Each roll-up has about 215 calories and 8.4 grams of fat.


Lasagna Roll-ups

Ingredients:
   20 lasagna noodles
   1 1/3 jar pasta sauce
   1 pound ground turkey
   1 container ricotta cheese part skim milk
   1/2 cup Parmesan cheese
   1 cup mozzarella cheese
   2 eggs
   parsley

Directions:

Boil noodles according to package directions. Brown ground turkey, drain, and mix with pasta sauce. Combine ricotta cheese, Parmesan cheese, mozzarella cheese, eggs, and parsley. Coat baking pan with cooking spray and thin layer of meat sauce. Spread cheese mixture on a noodle, followed by a layer of meat sauce, roll, and lay in the pan.


  Continue this with all twenty noodles. (I used 2 pans so that the roll-ups were not touching and would be easy to remove from the pan.) 


Top rollups with remaining meat sauce and additional mozzarella cheese if desired. Bake at 350 for 20 minutes.

Since I'm only cooking for two people, I'll freeze the leftover roll-ups individually which will make for a quick yummy meal when in a rush.

Wednesday, May 2, 2012

Another Blog :)

At the beginning of the year, like every other person in the world, I made a New Year's Resolution.  Ok, so I actually made more than one.  I always like to make a couple of resolutions, that way I have a better change of succeeding!

Introducing:  Perfectly Organized Chaos 

One of my resolutions was to start a family/personal/life blog and keep it updated.  I'm happy to say that I have indeed done this.  Now I know it is only May, but come on people, that is pretty good for a New Year's Resolution.  Even if the year is not over yet, I consider it a success.

This blog currently consist of lots of wedding things because that is what is currently controlling my life.  If you would like to get to know me a little better, you can head on over and check it out.


Thursday, April 26, 2012

Wedding DIY-Cake Table Napkins

I'm much too cheap to pay for napkins with our names and wedding date on it. However, I didn't want just plan napkins either. Instead, I decided to emboss the napkins.


I found several stamps on clearance that were perfect.


I also did black embossing on white napkins.


They are not perfect by any means, but they are a cute addition.


My grandma and mom helped me out with this little DIY. We had a wonderful assembly line going on!

Sunday, April 15, 2012

Wedding DIY-Bubbles

Riley and I are getting married at the beginning of June, so we are hoping for a nice weather. We're planning on having a bubble send-off as we leave the chruch and head to the reception.


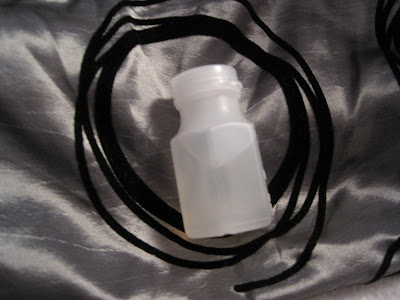
I found these bubbles at the Dollar Tree. They come in packages of 9 and are only a dollar.


The bubbles needed a little personalization, so I cut out Rs using black vinyl. Looking better, but still needed a little something more.


I tied a red ribbon to the top of every bottle of bubbles. It still has the simplistic look, but isn't too boring.

Thursday, April 5, 2012

Wedding DIY-Kid's Crayons

Riley and I will be having a reception full of fun for the adults. I wanted to make sure that the kids had something fun to do too. I've created Kid's Activity Books and also crayons to go along with them.

I found some Christmas Crayons on clearance during the summer online at Oriental Trading. They were super cheap and the box ends were red, which matches our wedding colors.


I had leftover cards from my Tears of Joy Packets. I'm all about using what I already have, so I cut off the top portion with the saying and used the name and wedding date.


I simply wrapped plain white printer paper around the crayon boxes and secured it with double-sided tape. Then I attached the portion of the card on the front.


Since I was using leftover cards and white printer paper that I already had on hand, this project was super cheap and only took me about an hour.

Friday, March 30, 2012

Wedding DIY-Kid's Activity Book

I made an activity book to keep the kiddos entertained at our wedding reception.


I included games and activities.


There are coloring pages included too.
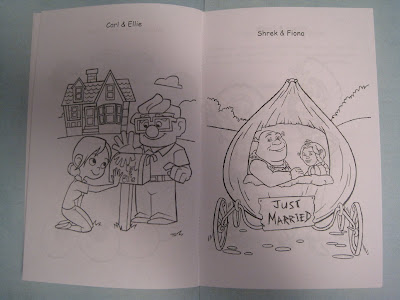


I made the book using Word and it was really pretty simple.


The books are sewn together using regular white thread.


I think the little ones will enjoy them :)

Saturday, March 3, 2012

Wedding DIY-Reception Flip Flops

With all the dancing that will occur at our wedding, it's safe to say that heels will be ditched.

I always end up barefoot on the dance floor and go home with disgustingly dirt feet.

When I saw the idea for "dancing shoes" to be provided for guests, I jumped on the idea.


I bought about 30 pairs of flip-flops from Old Navy. I think I paid about $13.00 total because they were on clearance and I had a coupon too.


I used my Cricut to cut out black and white cardstock to label the size for each pair of flip-flops.


I wrapped black ribbon around the flip-flops to secure them together. I used a hot glue gun, which only resulted in a few burns.


They are simple, but cute.


I think I'll put them in a fancy red bucket or basket of some sort. I'll be sure to post what I come up with.


Sunday, February 19, 2012

Wedding DIY-Engagement Photo Props

Riley and I are having our engagement photos taken soon so I decided to make a few props.


This one is made out of burlap. I painted the letters using a stencil I created using my Cricut. I attached the triangles together using a thin white ribbon and hot glue.


This banner was made using burlap too. Again, I painted our wedding date on using stencils I created using my Cricut. Everything is attached using hot glue.

Sunday, February 12, 2012

Wedding DIY-Tears of Joy Packets

I'm not sure if our wedding will be emotional or not, but I found this idea on a wedding blog and just had to try it out for myself.


I ordered 100 small glassine envelopes from ebay. I folded up a tissue and placed it inside. A silver ribbon was attached using rolling double-sided tape to keep the flap tucked under.
I ordered 250 "free" business cards from VistaPrint. I only had to pay for shipping. The cards read "Tears of Love, Tears of Laughter, Tears of Happily Ever After." The cards also have our names and wedding date on them. The cards got attached to the front of the envelopes.


I haven't decided where I am going to put these yet. They will either be placed in the pews or in the back of church with the programs.
Even if nobody but me sheds a tear, they were fun, cheap, and easy to make.


Saturday, February 4, 2012

Wedding DIY-Glitter Shoes

I would love to wear some wicked hot heels on my wedding day.

BUT, I have been told that I am allowed no heel of any kind.


Riley and I are about the same height (technically I think I am taller, but he won't admit it) and so he has asked that I wear the flattest shoe I can find.


I found these ballet flats on sale at target.


I used Martha Stewart glitter and Modge Podge to glitter up my shoes.


I think they are great for the wedding because red is one of my colors and I'm a Kansas girl so I get a little of the Wizard of Oz feel going on too :)


Saturday, January 28, 2012

Wedding DIY-Tealights

This was one of those ideas that sounds great until you start actually doing it.


I plan on using a bunch of little tealights to place around the centerpieces at our wedding reception. I thought it would be really cute to use vinyl to add words to them.


I bought a bunch of tealights from Bath & Body Works when they were on sale. They burn for 3.5 hours, which is longer than any others I could find.


Then using my Cricut, I cut out words using black vinyl and wedded out all the extra. The cutting and the weeding took FOREVER! I had to take out the middle of the Es, Os, and As, which doesn't seem like all that much work, but when they are so tiny-its very time consuming.


I used Cricut Transfer Tape to transfer the vinyl to the tealights.


It was a very simple project and I'm happy with the end result.

They read: Happiness, Love, Joy, Bliss, Cherish, Forever.


However, it took WAY more time than I'm willing to admit. It's really kind of embarassing how long these little thing took.


I'll admit though, these 150 tealights kicked my butt!

Related Posts Plugin for WordPress, Blogger...